Step 1
Download these files:
Step 2
Note: adb is required
Push misc.img, busybox, and psnueter using the following commands:
adb push psneuter /data/local/
adb push busybox /data/local/
adb push misc.img /data/local/
adb shell chmod 777 /data/local/psneuter
adb shell chmod 777 /data/local/busybox
Step 3
This step will gain temp root and flash the custom misc.img. Run:
adb shell
Now the shell should display “$”.
Run:
/data/local/psneuter
You will now be kicked out of adb, and adb will restart as root. Let’s confirm the md5 of misc.img:
adb shell
At this point, the shell should display “#”.
Run:
/data/local/busybox md5sum /data/local/misc.img
Output should be “c88dd947eb3b36eec90503a3525ae0de.” If it’s anything else, re-download the file and try again.
Now let’s write misc.img:
dd if=/data/local/misc.img of=/dev/block/mmcblk0p17
exit
Step 4
Here you will rename the downgrade RUU as PG05IMG.zip and place it on your SD card. Then, run the following command:
adb reboot bootloader
Choose the bootloader option and press power; let the ROM flash. When asked to upgrade, choose yes. Don’t freak, it’s a long reboot.
Once done, reboot and delete PG05IMG.zip from your SD card.
Set up the two part exploit, to gain root and unlock MMC.
Push wpthis, busybox, and psnueter.
adb push psneuter /data/local/
adb push busybox /data/local/
adb push wpthis /data/local/
adb shell chmod 777 /data/local/psneuter
adb shell chmod 777 /data/local/busybox
adb shell chmod 777 /data/local/wpthis
Step 5
Next, enter the following commands:
adb shell
/data/local/psneuter
To unlock eMMC:
adb shell
/data/local/wpthis
exit
Step 6
Please pay attention – this is very important. This step involves a small chance of bricking if you mess up.
To push the eng bootloader:
adb push hbooteng.nb0 /data/local/
adb shell
/data/local/busybox md5sum /data/local/hbooteng.nb0
If the output does not match “6991368ee2deaf182048a3ed9d3c0fcb” exactly, stop, delete it, and re-download it. Otherwise, continue.
Now we will write the new bootloader.
dd if=/data/local/hbooteng.nb0 of=/dev/block/mmcblk0p18
Confirm proper write:
/data/local/busybox md5sum /dev/block/mmcblk0p18
If the output does not match “6991368ee2deaf182048a3ed9d3c0fcb,” try again; if it still doesn’t work, seek help from chat.andirc.net in channel #thunderbolt. DO NOT REBOOT.
Now, reboot your phone and put the custom RUU (PG05IMG.zip) on your SD card. Then flash it. This will upgrade you to release firmware with an S-OFF bootloader.
Next, run this command:
adb reboot bootloader
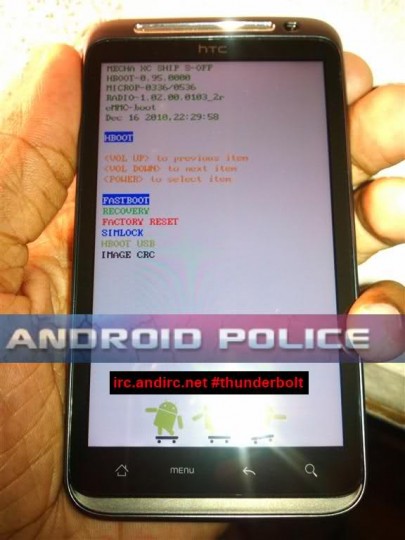
After it flashes, you will be running release firmware with S-OFF.
Step 7
Push SU, busybox, and psneuter.
adb push psneuter /data/local/
adb push busybox /data/local/
adb push su /data/local/
adb shell chmod 777 /data/local/psneuter
adb shell chmod 777 /data/local/busybox
To gain root:
adb shell
/data/local/psneuter
The following will remount /system and set up SU:
adb shell
mount -o remount,rw -t ext3 /dev/block/mmcblk0p25 /system
/data/local/busybox cp /data/local/su /system/xbin/su
chown 0:0 /system/xbin/su
chmod 6755 /system/xbin/su
Step 8
Install Superuser from the Market.
Reboot your phone. You should now have full root permissions.
Step 9
Finally, install ROM Manager and flash the ThunderBolt recovery.
 Tecnophone.it Tecnologia & cellulari per tutti i gusti!